
5. Device Connection
Streszczenie: Podłączenie czytnika ID5000 do klienta IDMVS: instalacja oprogramowania, wyłączenie zapory Windows, ustawienie sieci komputera (Jumbo Packet 9014 B), zmiana adresu IP urządzenia i połączenie z klientem.
EN: Connecting the ID5000 to the IDMVS client: software installation, turning off Windows firewall, PC network settings (Jumbo Packet 9014 bytes), modifying the device IP and connecting.
Dotyczy: przemysłowy czytnik kodów Hikrobot serii ID5000 (złącze M12 12-pin, Gigabit Ethernet, RS-232; obsługa przez klienta IDMVS)
Źródło: dokumentacja producenta (Hikrobot ID5000 Series Industrial Code Reader User Manual, V2.5.0); opisy rysunków – opracowanie Multiprojekt
Device connection to the client software is required for device’s configuration and remote operations. This section introduces how to install the client software, set PC network, connect the device to the client software, etc.
5.1 Install Client Software
IDMVS is a client software for device configuration and remote operations.
Steps
Note:
- Check the Windows version. The client software is compatible with 32/64-bit Windows XP/7/10.
- You can get the client software installation package from
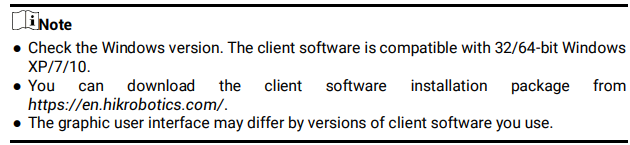
1.graphic user interface may differ by different versions of client software you use.
- Double click the installation package to start installing the client software.
2. - Select the language.
3. - Read and check Terms of the License Agreement.
4. - Click Start Setup.
5. - Select installation directory and click Next.
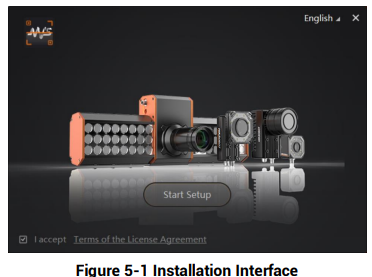
Figure 5-1 Installation Interface
6.Figure description (text version): Installer window: language selection (English) at top right, Start Setup button in the middle and the "I accept Terms of the License Agreement" check box at the bottom.
- Finish the installation according to the interface prompts.
5.2 Turn offOff Firewall
To ensure stable client running and image transmission, you are recommended turning off Windows firewall before using the client software.
Steps

1.
- Go to Windows Firewall.
Windows XP system: Click Start → Control Panel → Security Center → Windows Firewall.
Windows 7 system: Click Start → Control Panel → Windows Firewall.
Windows 10 system: Click Start → Control Panel → System and Security → Windows Defender Firewall.2. - Click Turn Windows Defender Firewall on or off on the left.
3. - Select Turn off Windows Defender Firewall (not recommended).
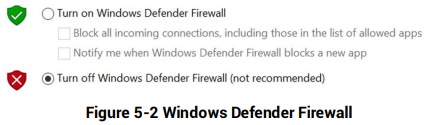
Figure 5-2 Windows Defender Firewall
4.Figure description (text version): Firewall settings: "Turn on Windows Defender Firewall" (with options to block all incoming connections and to notify when a new app is blocked) and the selected option "Turn off Windows Defender Firewall (not recommended)".
- Click OK.
5.3 Set PC Network
To ensure stable image transmission and normal communication between the PC and the device via client software, you need to set the PC network before using the client software.
Steps

1.
- Go to PC network settings page: Start → Control Panel → Network and Internet → Network and Sharing Center → Change adapter settings.
2. - Select NIC and set the IP obtainment mode.
●- Select Obtain an IP address automatically to get an IP address of the PC automatically.
● - Or select Use the following IP address to set an IP address for the PC manually.
- Select Obtain an IP address automatically to get an IP address of the PC automatically.
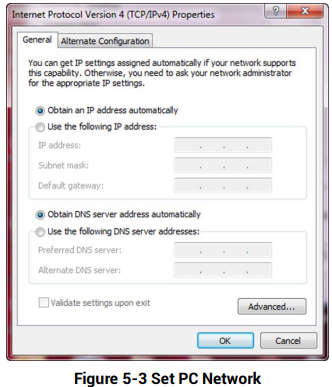
Figure 5-3 Set PC Network
3.Figure description (text version): Internet Protocol Version 4 (TCP/IPv4) Properties, General tab: "Obtain an IP address automatically" and "Obtain DNS server address automatically" are selected; alternatively "Use the following IP address" with IP address, Subnet mask and Default gateway fields, and manual DNS servers.
- Set NIC property.
1)- Go to NIC settings page: Control Panel → Hardware and Sound → Device Manager → Network Adapter.
2) - Select corresponding network interface card, and click Advanced.
3) - Set Jumbo Packet value to 9014 Bytes.
- Go to NIC settings page: Control Panel → Hardware and Sound → Device Manager → Network Adapter.
5.4 Set Device Network
You can set and operate the device in the client software only when the device is in the same network segment with the PC where the client software is installed.
Steps1.
- Double click the client software to run it.
2. - Click
 to find the device.
3. - Right click the device to be connected.
4. - Click Modify IP.
5. - Set the IP address of the device in the same network segment with the PC.

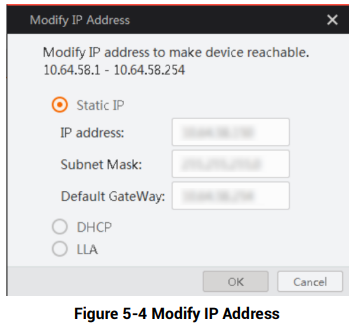
Figure 5-4 Modify IP Address
6.Figure description (text version): Modify IP Address dialog showing the allowed address range (example 10.64.58.1 – 10.64.58.254) and the modes Static IP (IP address, Subnet Mask, Default GateWay fields), DHCP and LLA, with OK and Cancel buttons.
- Click OK.
5.5 Connect Device to Client Software
Make sure that your device IP address is in the same network segment with the PC where
you installed the client software before connecting the device to it.
Double click the device name in the device list, or click 
 to connect the device to the client.
Słowa kluczowe
Hikrobot ID5000, IDMVS, client software, install, firewall, Windows Defender, PC network, NIC, Jumbo Packet, 9014, Modify IP, connect device, połączenie